Automating Home Assistant
Once your devicesA device is a model representing a physical or logical unit that contains entities. are set up, it’s time to put the cherry on the pie: automationAutomations in Home Assistant allow you to automatically respond to things that happen in and around your home. [Learn more].
We’re going to create two automations: One, to turn on the lights when the sun sets. And a second one to dim the light at a certain time in the evening before a workday.
Turning on the lights before sunset
Prerequisites
This tutorial assumes the following:
- You have installed Home Assistant
- You have completed the onboarding steps
- You have followed the steps on adding an integration
- You have a light that is integrated into Home Assistant
- If you don’t have a light yet, and are unsure what to buy, try Philips Hue, nanoleaf, or products supporting WLED
To automatically turn on the lights before sunset
-
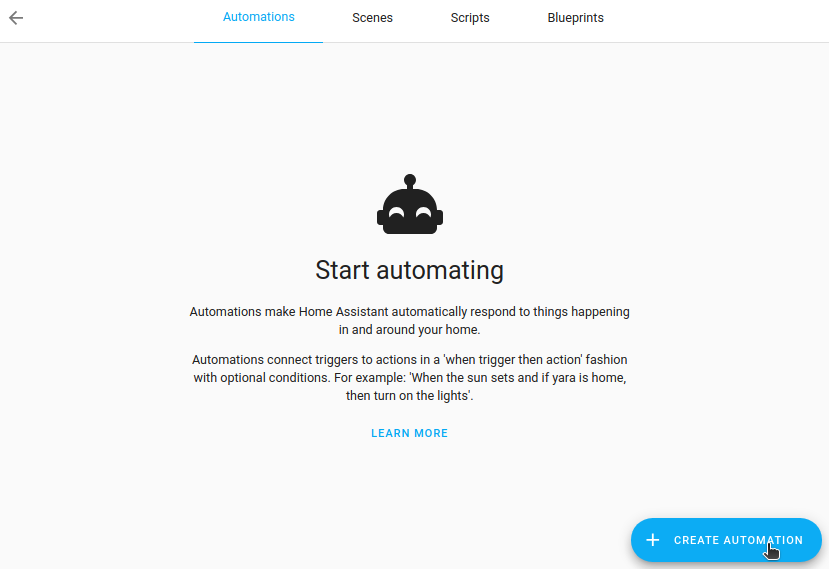
Go to Settings > Automations & scenes and select Create Automation.
-
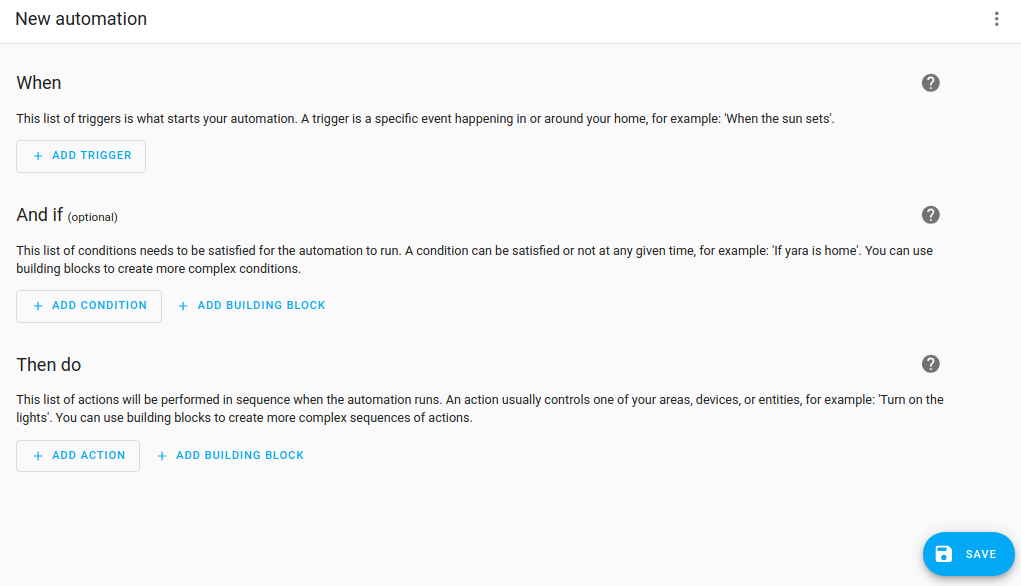
Then, select Create new automation. This brings up an empty automation page.
-
-
The first step is defining what should triggerA trigger is a set of values or conditions of a platform that are defined to cause an automation to run. [Learn more] the automation to run.
- In this case, we want to use the event of the sun setting to trigger our automation.
- Select Add trigger, type
Sunand select it.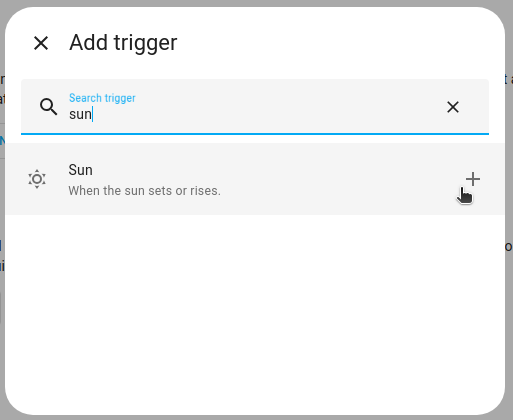
-
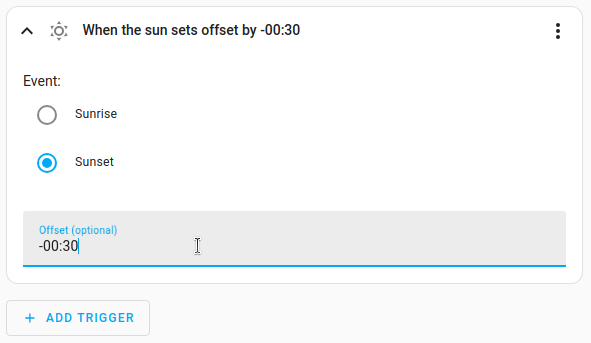
Select Sunset.
- We want the automation to be triggered a little before that, so let’s add
-00:30as the offset. This indicates that the automation will be triggered 30 minutes before sunset. Neat!
- We want the automation to be triggered a little before that, so let’s add
-
Once we have defined our trigger, we need to define what should happen.
- Select Add action.
-
Type
lightand select Light turn on.- For this automation, we’re going to turn on all lights in the living room, so let’s select the Area.
- This only works if your lights are assigned to an areaAn area in Home Assistant is a logical grouping of devices and entities that are meant to match areas (or rooms) in the physical world: your home. For example, the
living roomarea groups devices and entities in your living room. [Learn more]. - To learn more about grouping devices in areas, refer to the area documentation.

-
To save the automation, select Save. Give the automation a name, add a Description, and Save again.
- When choosing a name, be specific, so that you can find it even when you have many automations. For example,
Turn on living room table light at sunset. - Now wait until it’s 30 minutes before sunset and see your automation magic!
- Or follow these steps to test your automation right away.
- When choosing a name, be specific, so that you can find it even when you have many automations. For example,
Dimming the lights the night before a workday
This automation dims the light at a specific time before a workday.
Prerequisites
This tutorial assumes the following:
- You have installed Home Assistant
- You have completed the onboarding steps
- You have followed the steps on adding an integration
- You have a dimmable light that is integrated into Home Assistant
To dim the light the night before a workday
-
Go to Settings > Automations & scenes and select Create automation.

-
Then, select Create new automation. This brings up an empty automation page.

-
-
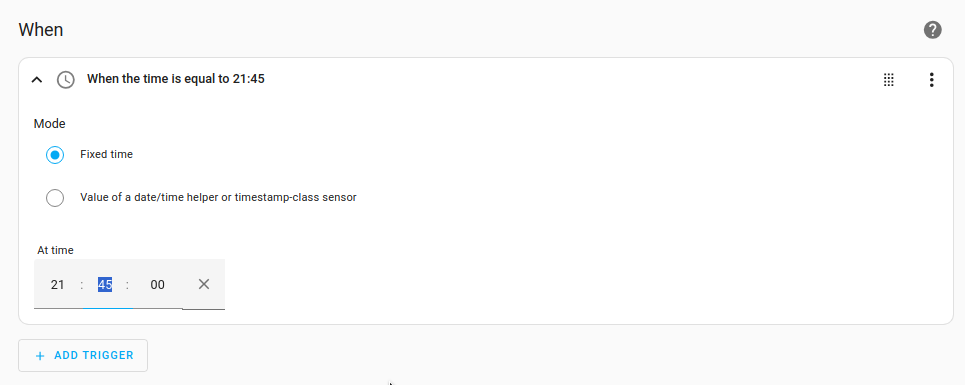
We want the light to start dimming at 21:45. This means we want an automation that is triggered by time.
- Select Add trigger > Time and location > Time.
- Select Fixed time and enter the time.
-
We want to do this only if tomorrow is a workday.
- Select Add condition > Entity > State.
- Under Entity, enter
workdand select your workday sensor. - Under State, select On.
-
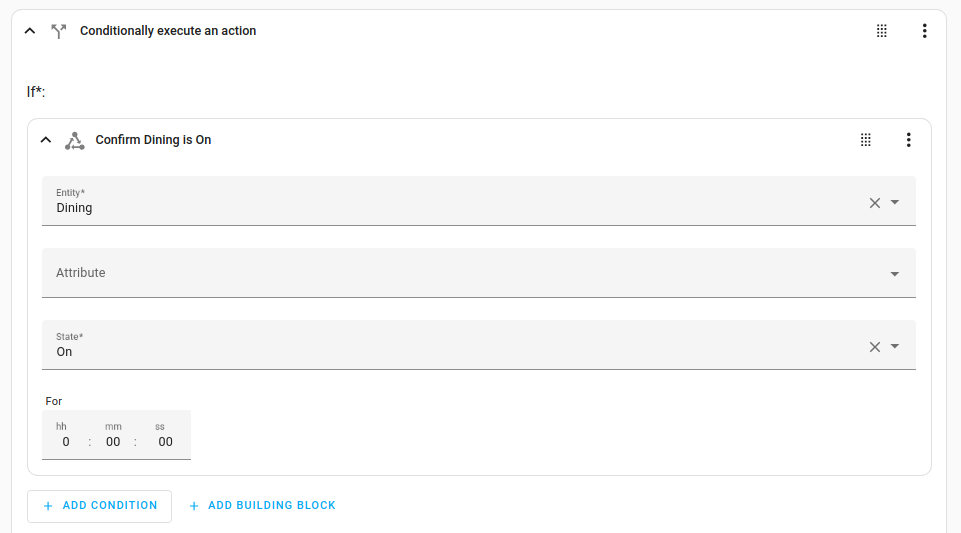
Next, we want to make sure the light is only dimmed when it is actually on. No reason to do this if the light is not on.
- To achieve this, we use an If-then action. Select Add action > Building blocks > If-then.
- You now get a block called Conditionally execute an action. From the Entity list, select your light.
- Under If, select Add condition > Entity > State.
- Under State, select On.
-
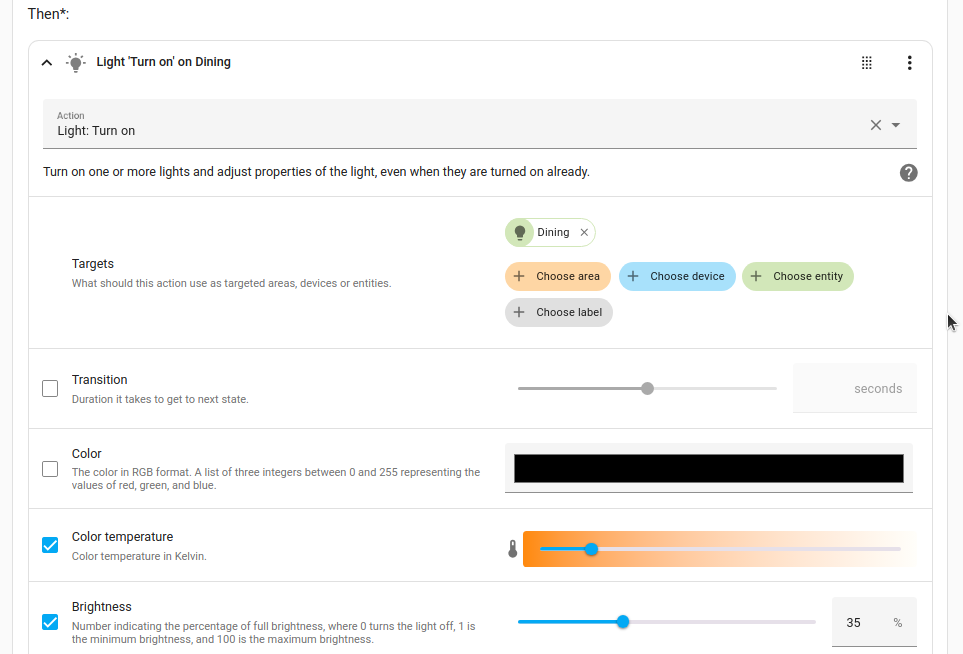
Now we want to define the action that is performed when the condition is true (when the light was on).
- Under Then, select Add action > Light turn on.
- Under Entity, select your light.
- Define the light settings, such as brightness, temperature, or color. The available settings depend on your light.
-
To save the automation, select Save. Give the automation a name (for example,
dim living room table light night before workday), add a Description, and Save again.
If after completing this getting started you are interested in reading more about automations, we recommend the following pages:
Please note, these pages may require a bit more experience with Home Assistant than you probably have at this point of this tutorial.