Customizing entities
After adding a new device, you might find the automatically assigned entity ID too technical and the entity lacking a friendly name. You can personalize these elements to better fit your naming conventions or modify other attributes like the icon.
Recommendations on entity naming and related elements
If you want a straightforward and organized Home Assistant setup, create a simple name for each entity, as well as for each related floor, area and device, and then configure everything properly. Name every element for what it is and Home Assistant will add the context around it based on what you have configured. Here are a few recommendations and examples:
- Create a short, standalone name for each item. Leave out its location and what it belongs to. For example, a good name for an area is
Living roominstead ofGround floor living room, and a good name for a device isMulti sensorinstead ofOffice multi sensor. - Assign an area to each device and assign a floor to each area. Home Assistant will use that information in pickers, dialogs, and tables so you don’t need to add the location of areas, entities, and devices in their names.
- Customize the presentation of floors, areas, devices, and entities by editing the cards and views of dashboards. For example, you can adjust the displayed name of a dashboard entity card or remove it if it is longer than you would like, instead of changing the entity name.
Changing the attributes of an entity
To change entity attributes, follow these steps:
-
Go to Settings > Devices & services > Entities and select the entity from the list.
-
In the top-right corner, select the
cog icon. 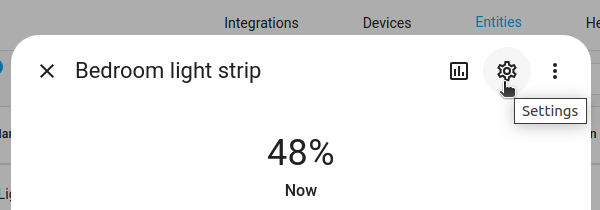
-
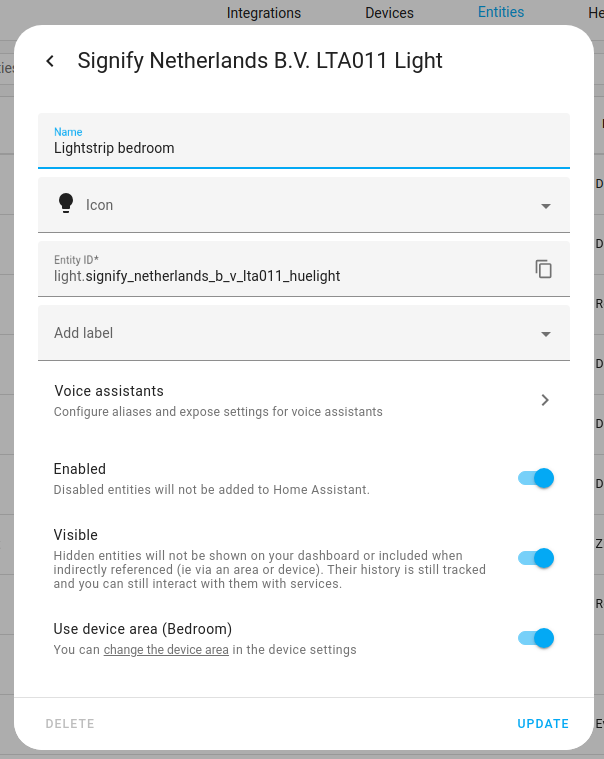
Enter or edit the attributes:
-
For example, the entity ID here could be shortened to
binary_sensor.lumi_sensor_aq2_opening.- You can use lowercase letters, numbers, and underscores.
- The ID must not start or end with an underscore.
- To undo the change and revert the ID to the default, select the
icon. - To revert all the entity IDs for a device, on the device page, select the three dots
menu, then select Recreate entity IDs. - Result: This resets the entity ID and applies the current default naming convention.
- The terms used to generate the entity ID depend on a few factors. Prioritization is as follows:
- If you changed the name of the entity, the entity name will be used.
- The entity ID suggested by the integration (just a few integrations do this).
- The default name in the user language, if using Latin script.
- If something other than Latin script is used, the entity ID is based on the English default name. This is because entity IDs must use lowercase letters, numbers, and underscores.
- The terms used to generate the entity ID depend on a few factors. Prioritization is as follows:
-
Enter or edit the entity name.
- In this example, this would change “Opening”.
-
If needed, from the Shown as menu, you can select a different device class.
-
If you like, add a label.
-
-
To apply the changes, select Update.
-
If you changed the entity ID and use this entity in automations or scripts, update the entity ID there as well.
- Changing only the entity name does not affect your automations or scripts because they refer to the entity ID.
- Go to Settings > Automations & scenes, open the respective tab, and find your automation or script.
Changing the entity ID format for new entities
Home Assistant generates entity IDs for new entities based on parts of your setup, like the area that is assigned to the entity, the device it belongs to, and the entity name. For example, a temperature sensor on a thermostat in the living room might have the entity ID sensor.living_room_thermostat_temperature. The default format of entity IDs uses the area, device, and entity name, in that order. To get the most out of the default entity ID format, check the recommendations on entity naming and related elements.
However, you can change the default format of entity IDs by defining which parts will be used and its order. The new format that you set will only be used when Home Assistant generates a new entity ID, so existing entities keep their current entity IDs. You can still rename the entity IDs afterwards in the entity settings.
Some integrations suggest their own entity ID for new entities. In that case, this format is not used.
To change the format:
- Go to Settings > System > Entity ID format.
- Add, remove, or reorder the Floor, Area, Device, and Entity parts to build the format you want. The Preview shows an example of the result.
- Select Save.
If you want to go back to the default format, select Reset to default.
When you recreate the entity IDs for a device, Home Assistant will use the new format to generate them.
Customizing an entity in YAML
If your entity is not supported, or you could not customize what you need via the user interface, you need to edit the settings in your configuration.yamlThe configuration.yaml file is the main configuration file for Home Assistant. It lists the integrations to be loaded and their specific configurations. In some cases, the configuration needs to be edited manually directly in the configuration.yaml file. Most integrations can be configured in the UI. [Learn more] file. For a detailed description of the entity configuration variables and device class information, refer to the Home Assistant Core integration documentation.