Zone
Zones allow you to specify certain regions on a map. They enable zone presence-detection. This information can be used in automations. For example, to start the vacuum after you left home or start the heating at home when you leave the office.
Create a zone for each area you want to automate on. For example, work, school, and home. Different technologies can be used to detect presence in these zones. A common method is app-based detection using a mobile phone.
 Map dashboard showing a school, work, and a home zone and the location of two people.
About the home zone
During the onboarding process, Home Assistant asked for your home location. You either entered this manually or asked Home Assistant to detect it automatically. This location was used to create the home zone with a 100 m radius. The home zone is a special, pre-defined zone with a few characteristics that set it apart from other zones.
- The name of this zone is defined by the name of your Home Assistant installation name (which defaults to “Home”).
- The home zone cannot be deleted and is designated with the home icon in the zone configuration page.
- The home zone’s location is used by integrations that are location-based. For example, the Sun integration, which uses it to calculate the position of the sun relative to your home.
- During onboarding, Home Assistant used the location to define settings such as the unit system and time zone. If you change the location later, unit system and time zone will not be changed automatically anymore.
- Devices that are in the home zone will not appear on the map in the Home Assistant UI. For example, if you are using your phone for presence detection, you won’t see your phone on the Map dashboard while you are at home.
Adding a new zone or editing zones
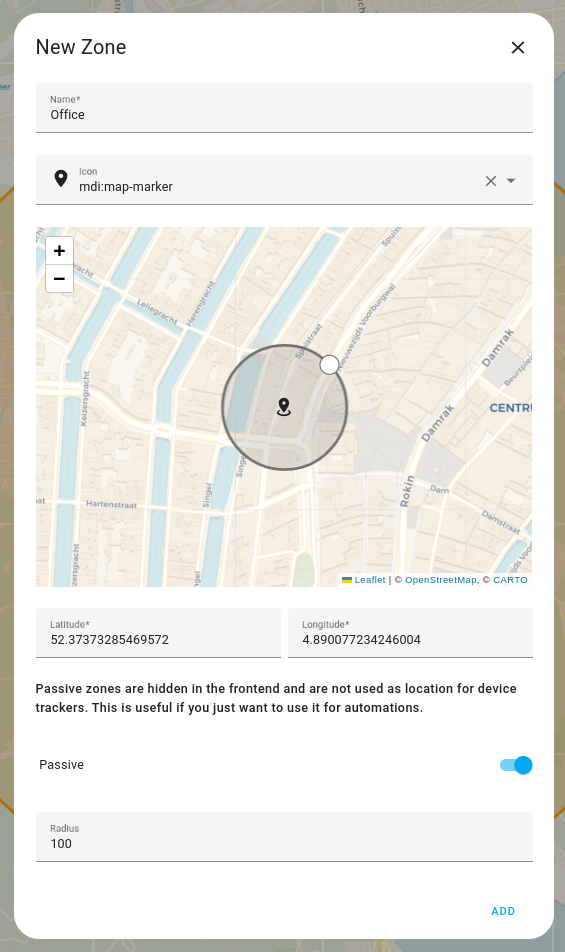
-
To edit an existing zone, select the edit
button. To add a new zone, select Add zone. -
Give your zone a name, for example
Nina's office, orschool.- The home zone always has the name of your Home Assistant installation. To change the name of the home, go to Settings > System > General.
-
Pick any icon from Material Design Icons
and prefix the name with mdi:.- For example,
mdi:school,mdi:briefcase,mdi:home,mdi:cart, ormdi:castle. - For the home zone, the icon cannot be changed.
- For example,
-
To change location or radius, under Edit location, select edit.
- To adjust the location, specify the GPS coordinates or drag the icon on the map
- To change the zone radius, change the size of the zone circle or edit the Radius in meters.

-
If you want to hide the zone from the frontend and not use the zone for device tracker state, enable Passive. You can still use it in automations.
- For the home zone, Passive is not available.
-
To save your changes, select Update.
Editing zones in YAML
Zones can also be configured via configuration.yamlThe configuration.yaml file is the main configuration file for Home Assistant. It lists the integrations to be loaded and their specific configurations. In some cases, the configuration needs to be edited manually directly in the configuration.yaml file. Most integrations can be configured in the UI. [Learn more]. If you define these settings in YAML, they cannot be edited in the UI. They will appear greyed out.
# Example configuration.yaml entry
zone:
  - name: School
    latitude: 32.8773367
    longitude: -117.2494053
    radius: 250
    icon: mdi:school

  - name: Work
    latitude: 32.8753367
    longitude: -117.2474053

  # This will override the default home zone
  - name: Home
    latitude: 32.8793367
    longitude: -117.2474053
    radius: 100
    icon: mdi:account-multiple
To find the latitude/longitude of a certain place you can use Google Maps
State
The state of a zone is a number, which represents the number of persons that are currently in a zone.
The number of persons in a zone can be helpful for automations, for example, to determine if someone is home, or home alone, or no-one is at home at all. The same applies to all other zones.