Common tasks - Supervised
Configuring access to files
Your Home Assistant Operating server includes two repositories by default: The official core add-on repository, and the community add-on repository. All of the add-ons mentioned here can be installed by navigating to the add-on store using Settings > Add-ons > Add-on Store in the UI.
One of the first things to take care of after installing Home Assistant OS is to provide yourself access to files. There are several add-ons commonly used for this, and most users employ a mix of various add-ons. Default directories on the host are mapped to the add-ons so that they can be accessed by the services any particular add-on might provide. On the host system these directories exist on the /data partition at /mnt/data/supervisor/.
Using any of the add-ons listed below, the following directories are made available for access:
addonsbackupconfigmediasharessl
Installing and using the Samba add-on
The Samba add-on allows you to share the directories on Home Assistant with other systems on your network. After installing the add-on, you can then also edit files using the editor of your preference from your client computer. This add-on can be installed from the add-on store’s official repository.
To install the add-on, follow these steps:
- Go to Settings > Add-ons > Samba share and select Install.
- On the Configuration tab, define Username and Password, store them in a safe place, and save your changes.
- You can specify any username and password.
- They are not related to the login credentials you use to log in to Home Assistant or to log in to the computer from which you are accessing the files.
- The add-on won’t start if username and password are not defined.
- For further configuration information, refer to the Documentation tab.
- To start the add-on, on the Information tab, select Start.
To access the Home Assistant directories from the other device, follow these steps:
-
Go to Settings > System > Network and take note of the Host name.
- Alternatively, you can look up the host name or IP address of your Home Assistant on your router.
-
How you connect from another device to Home Assistant depends on your system. Use one of the following options:
-
On Windows: Open File Explorer and in the address bar, enter the IP address or hostname with two backslashes as
\\your.ha.ip.addressor\\hostname.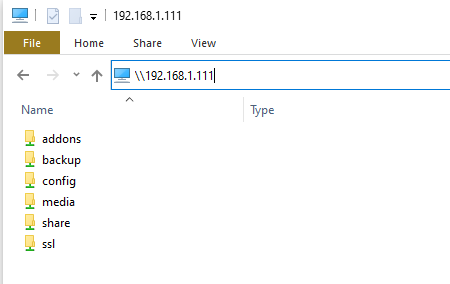 Screenshot of File Explorer displaying the navigation to a file share using an IP address
-
On OS X: Open Finder and select Go > Connect to Server… and enter the IP address or hostname as
smb://your.ha.ip.addressorsmb://hostname. -
On Ubuntu: Open Files and in the address bar, enter the IP address or hostname as
smb://your.ha.ip.addressorsmb://hostname.
-
-
Enter the credentials you entered in the Samba add-on configuration.
- You also have the option of having the credentials stored so that you do not need to enter them again.
-
Done! You now have access to the directories which you can then mount as a drive or pin to Quick Access.
Installing and using the Visual Studio Code (VSC) add-on
The Studio Code Server add-on provides access through a feature-packed web-based version of the Visual Studio Code editor. It currently only supports AMD64 and aarch64/ARM64 machines. The add-on also provides access to the Home Assistant Command Line Interface (CLI) using VSC’s built-in terminal, which allows for checking logs, stopping, and starting Home Assistant and add-ons, creating/restoring backups, and more. (See Home Assistant via Command Line for further info).
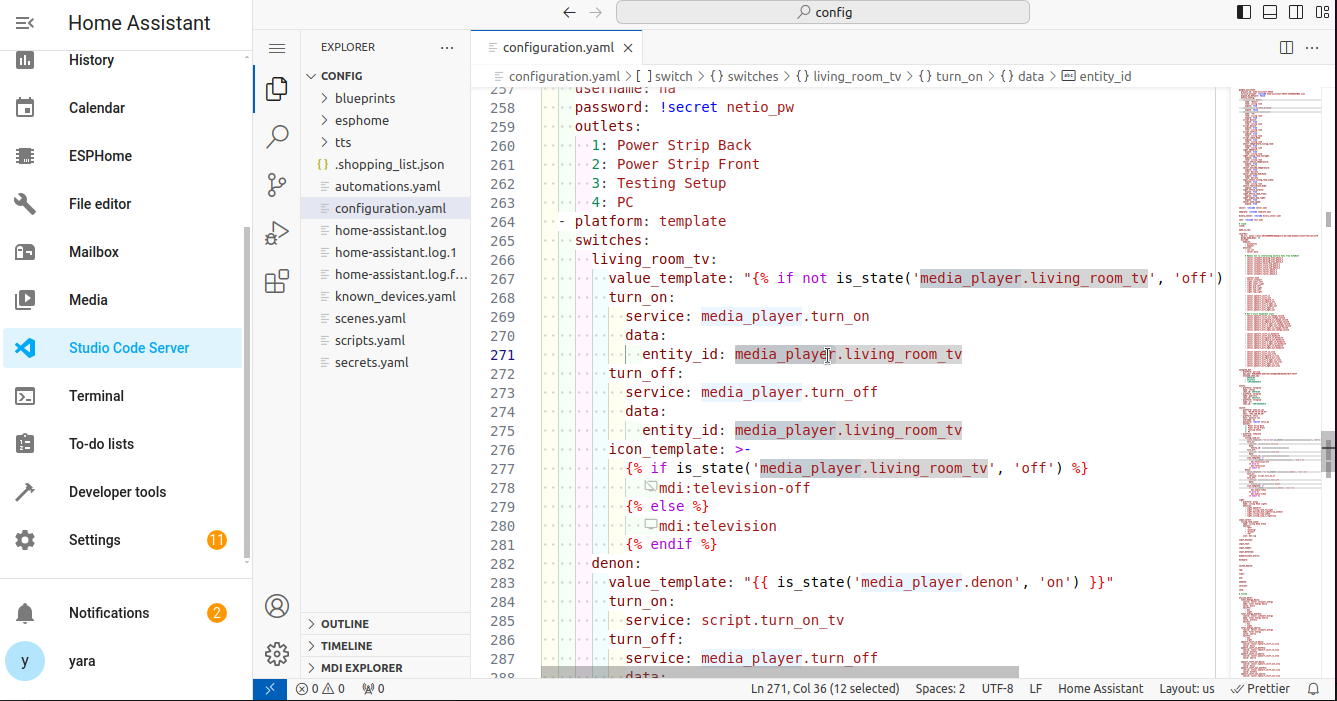 Example of a configuration.yaml file, accessed using the Studio Code Server add-on on a Home Assistant Operating System installation.
To install and use the Studio Code Server in Home Assistant, follow these steps:
- To install the add-on, go to Settings > Add-ons > Studio Code Server and install the add-on.
- Once you have the add-on installed, if you want, select the Show in sidebar option. Then, select Start.
- For information on configuration settings, open the Documentation tab.
- To start browsing, on the Info tab, select Open Web UI.
Installing and using the File Editor add-on
The File Editor add-on is a web-based file system browser and text editor. It is a more basic and light weight alternative to Visual Studio Code. YAML files are automatically checked for syntax errors while editing.
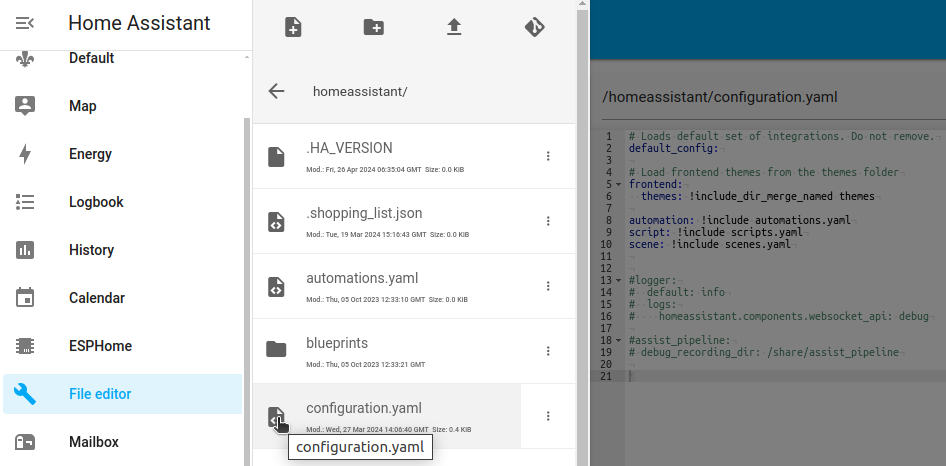 Example of a configuration.yaml file, accessed using the File editor add-on on a Home Assistant Operating System installation.
To install and use the File Editor in Home Assistant, follow these steps:
- To install the add-on, go to Settings > Add-ons > File editor.
- Once you have the add-on installed, you can edit files within your
/configdirectory.
- Once you have the add-on installed, you can edit files within your
- If you want to be able to access directories outside the
/configdirectory, in the add-on, open the Configuration tab and disable the Enforce basepath option.- Note: The Enforce basepath option is intended to protect you from inadvertently making changes to settings files.
- For information on other configuration settings, open the Documentation tab.
- To confirm your changes, select Save.
- To start browsing, on the Info tab, select Open Web UI.
Installing and using the SSH add-on
If you want to use the Home Assistant command line or an SSH client, you can do this through the Terminal & SSH add-on.
The Terminal & SSH add-on provides the following functionalities:
- It provides a web terminal that you can access from the Home Assistant user interface.
- It allows you to use the Home Assistant Command Line Interface (CLI) which provides custom commands for checking logs, stopping and starting Home Assistant and add-ons, creating/restoring backups, and more.
- For a list of command line commands, refer to Home Assistant via Command Line.
- It allows connecting to your system using an SSH client.
- It also includes common tools like nano and vi editors.
- The Terminal & SSH add-on does not provide access to the underlying host file system.
To get started with the Terminal & SSH add-on, follow these steps:
- In the bottom left, select your user to open the Profile page. Make sure Advanced Mode is enabled.
- To install the add-on, go to the add-on store under Settings > Add-ons and install the Terminal & SSH add-on.
- To use the web terminal, start the add-on, then select Open Web UI.
- You can now start typing your commands.
- If you want to access from an ssh client, you need to enter credentials:
- Open the Configuration page.
- Enter a password or authorized Keys.
- Then save and start the add-on.
Backup
To learn how to back up the system or how to restore a system from a backup, refer to the backup documentation under common tasks.
Alternative: Creating a backup using the Home Assistant Command Line Interface
In general, to create or restore from a backup, follow the steps described under common tasks. However, If you have the Home Assistant SupervisedHome Assistant Supervised is the full Home Assistant ecosystem, without the Home Assistant Operating System. [Learn more] installed, you can also create a backup from the command line. Follow these steps:
-
ha backups list- lists backups and their slugnames -
ha backups restore slugname- restores a specific backup -
ha backups new --name nameofbackup- create a backup
For additional information about command line usage, use the ha help command or refer to the Home Assistant Command Line documentation.
Update
Best practice for updating Home Assistant Core:
-
Back up your installation and store the backup and the backup emergency kit somewhere safe.
- This ensures that you can restore your installation from backup if needed.
- Check the release notes for backward-incompatible changes on Home Assistant release notes. Be sure to check all release notes between the version you are running and the one you are upgrading to. Use the search function in your browser (
CTRL + f/CMD + f) and search for Backward-incompatible changes. - Update Home Assistant.
- Review persistent notifications and log to see if there are any issues with your configuration that need to be addressed.
To update Home Assistant Core when you run Home Assistant Supervised you have 2 options.
- Open your Home Assistant UI.
- Navigate to the Settings panel.
- On the top you will be presented with an update notification.
-
Troubleshooting: If you do not see that notification:
- In the top right corner, select the three dots
menu and select Check for updates. - Go to System > Updates.
- Select the update notification.
- Select the cogwheel
, then set Visible to active.
- In the top right corner, select the three dots
-
Troubleshooting: If you do not see that notification:
ha core update --backup
The --backup flag here ensures that you have a partial backup of your current setup incase you need to downgrade.
Network storage
You can configure both Network File System (NFS) and Samba/Windows (CIFS) targets to be used within Home Assistant and add-ons. To list all your currently connected network storages, go to Settings > System > Storage in the UI.
You need to make sure you run a supported Home Assistant SupervisedHome Assistant Supervised is the full Home Assistant ecosystem, without the Home Assistant Operating System. [Learn more] installation with the latest version of the os-agent
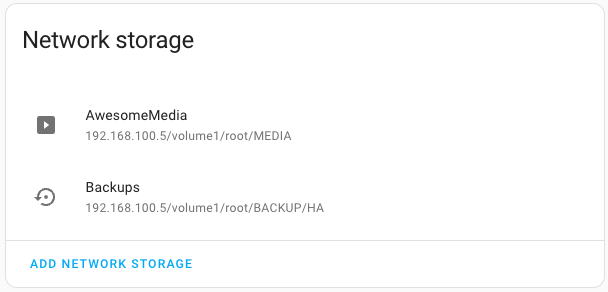
Add a new network storage
- Go to Settings > System > Storage in the UI.
- Select Add network storage.
- Fill out all the information for your network storage.
- Select Connect.
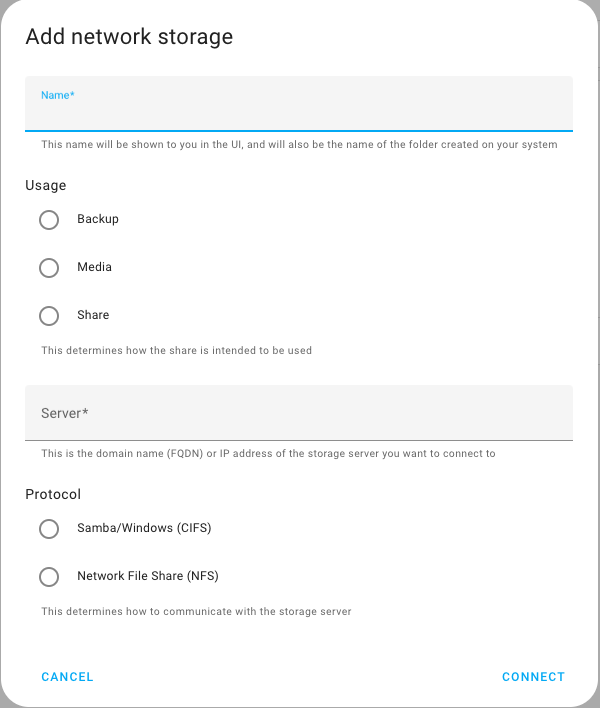
Network storage configuration
Here, you select how the target should be used. See usage types below
The username to use when connecting to the storage server. Use User Principal Name for domain accounts. For example: user@domain.com.
1 Options prefixed with [NFS] are only available for NFS targets.
2 Options prefixed with [CIFS] are only available for CIFS targets.
3 For the CIFS option, only version 2.1+ is supported.
Usage types
This will become a target. You can use it when creating an automatic or manual backup. The first storage you add of this type becomes your new default target. If you want to change the default target, check out the documentation below.
A new directory with the name you gave your network storage will be created under /media. This directory can be accessed by Home Assistant and add-ons.
Change default local backup location
By default, the first network storage of type Backup that you add is used as your local default backup location.
If you want to change the local network storage that is used to store your backups, follow these steps:
- Go to Settings > System > Backups.
- In the top-right corner, select the three dots
menu and select Change local backup location. - Select your preferred network location and save your changes.
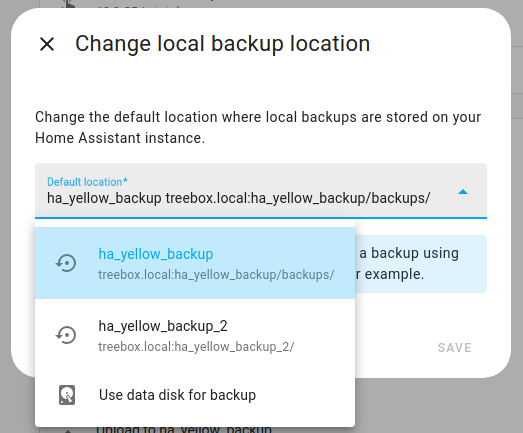
- Troubleshooting: Don’t see your external storage location? This list contains only the network storage targets you have added of type Backup.
Lost Password and password reset
Please refer to the I’m locked out! documentation page.
Installing a third-party add-on repository
Home Assistant allows anyone to create an add-on repository to share their own add-ons with the community.
Home Assistant cannot guarantee the quality or security of third-party add-ons. Use at your own risk.
To add an add-on repository, follow these steps:
- Copy the URL of the repository.
-
The URL is the git repository clone URL (on GitHub, use the Code button and copy the HTTPS URL).
-
This documentation uses an example add-on repository. It is not practically useful but follows the same steps.
-
If you are interested in add-on development, refer to our add-on development documentation.
https://github.com/home-assistant/hassio-addons-example
-
- Go to Settings > Add-ons and select Add-on store.
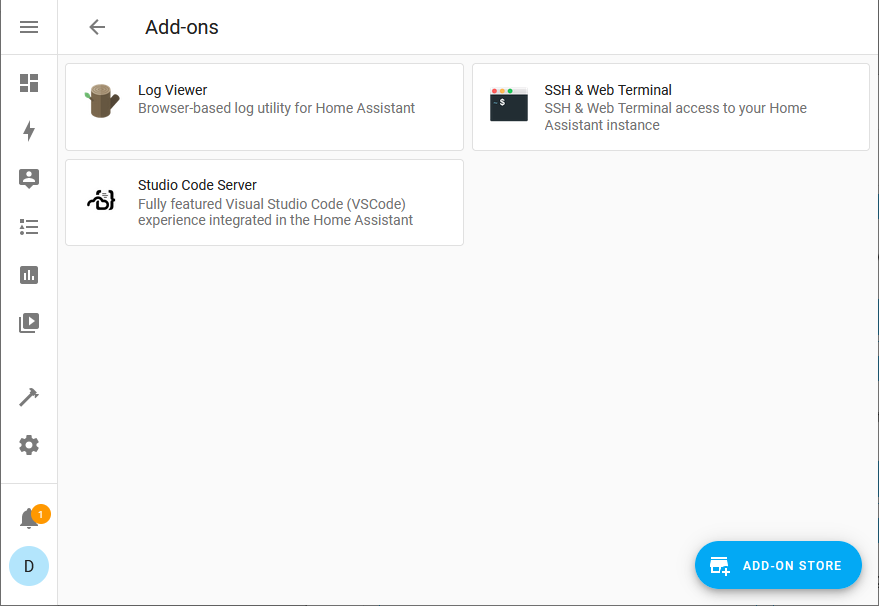
- In the top-right corner, select the three dots
menu, and select Repositories. - Add the URL of the repository and select Add.
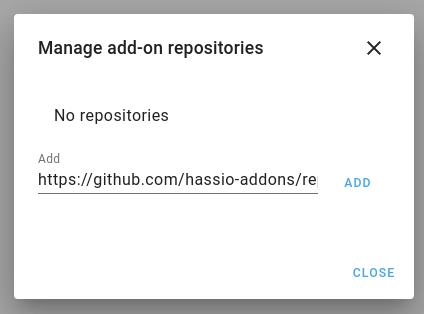
-
Result: A new card for the repository will appear.
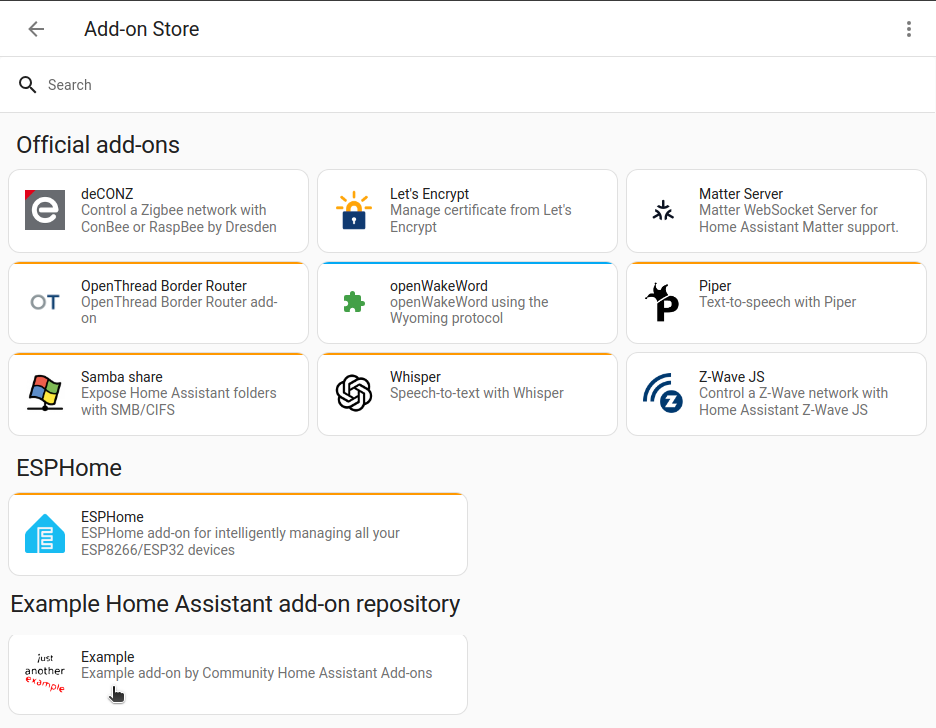
-
Result: A new card for the repository will appear.
Troubleshooting: Repository is not showing up
If you have added an add-on repository, but it’s not showing up, make sure to refresh your browser. If it still doesn’t show up, the add-on repository may contain invalid configuration data.
- Go to Settings > System > Logs and select Supervisor in the top right corner to get the Supervisor log.
- It should tell you what went wrong.
- Report this information to the add-on repository author.
Configuration check
After changing configuration or automation files, check if the configuration is valid before restarting Home Assistant Core.
Running a configuration check from the UI
- Go to your user profile and enable Advanced Mode.
- Go to Developer tools > YAML and in the Configuration validation section, select the Check configuration button.
- This is to make sure there are no syntax errors before restarting Home Assistant.
- It checks for valid YAMLYAML is a human-readable data serialization language. It is used to store and transmit data in a structured format. In Home Assistant, YAML is used for configuration, for example in the
configuration.yamlorautomations.yamlfiles. [Learn more] and valid config structures.
- If you need to do a more comprehensive configuration check, run the check from the CLI.
Running a configuration check from the CLI
Use the following command to check if the configuration is valid. The command line configuration check validates the YAMLYAML is a human-readable data serialization language. It is used to store and transmit data in a structured format. In Home Assistant, YAML is used for configuration, for example in the configuration.yaml or automations.yaml files. [Learn more] files and checks for valid config structures, as well as some other elements.
ha core check
Home Assistant versions
To see which version your system is running, go to Settings > About.
Running a specific version
To upgrade to a specific version, you can use the CLI. The example below shows how to upgrade to 2025.5.2.
ha core update --version 2025.5.2 --backup
The --backup flag here ensures that you have a partial backup of your current setup in case you need to downgrade later.
To downgrade your installation, do a partial restore of a backup instead.
Running a beta version
If you would like to test next release before anyone else, you can install the beta version.
- In Home Assistant, go to System > Updates.
- In the top-right corner, select the three-dots menu.
- Select Join beta.
- Go to the Configuration panel.
- Install the update that is presented to you.
-
Troubleshooting: If you do not see that notification:
- In the top right corner, select the three dots
menu and select Check for updates. - Go to System > Updates.
- Select the update notification.
- Select the cogwheel
, then set Visible to active.
- In the top right corner, select the three dots
-
Troubleshooting: If you do not see that notification:
-
Join the beta channel.
ha supervisor options --channel beta -
Reload Home Assistant Supervisor.
ha supervisor reload -
Update Home Assistant Core to the latest beta version.
ha core update --backupThe
--backupflag here ensures that you have a partial backup of your current setup in case you need to downgrade.
Running a development version
If you want to stay on the bleeding-edge Home Assistant Core development branch, you can upgrade to dev.
The dev branch is likely to be unstable. Potential consequences include loss of data and instance corruption.
-
Join the dev channel.
ha supervisor options --channel dev -
Reload the Home Assistant SupervisorThe Home Assistant Supervisor is a program that manages a Home Assistant installation, taking care of installing and updating Home Assistant, add-ons, itself, and, if used, updating the Home Assistant Operating System. [Learn more].
ha supervisor reload -
Update Home Assistant CoreHome Assistant Core is the heart of Home Assistant itself. It is a Python program that powers every installation type, but can be installed standalone. [Learn more] to the latest dev version.
ha core update --backupThe
--backupflag here ensures that you have a partial backup of your current setup incase you need to downgrade.
Home Assistant via the command line
On the SSH command line, you can use the ha command to retrieve logs, check the details of connected hardware, and more.
Home Assistant
ha core check
ha core info
ha core logs
ha core options
ha core rebuild
ha core restart
ha core restart --safe-mode
ha core start
ha core stats
ha core stop
ha core update
Supervisor
ha supervisor info
ha supervisor logs
ha supervisor reload
ha supervisor update
Host
ha host reboot
ha host shutdown
ha host update
Hardware
ha hardware info
ha hardware audio
Usage examples
To update Home Assistant to a specific version, use the command:
ha core update --version x.y.z
Replace x.y.z with the desired version like --version 2025.5.2
You can get a better description of the CLI capabilities by typing ha help:
The Home Assistant CLI is a small and simple command line utility that allows
you to control and configure different aspects of Home Assistant

Usage:
  ha [command]

Available Commands:
  addons         Install, update, remove and configure Home Assistant add-ons
  audio          Audio device handling.
  authentication Authentication for Home Assistant users.
  backups        Create, restore and remove backups
  banner         Prints the CLI Home Assistant banner along with some useful information
  cli            Get information, update or configure the Home Assistant cli backend
  core           Provides control of the Home Assistant Core
  dns            Get information, update or configure the Home Assistant DNS server
  docker         Docker backend specific for info and OCI configuration
  hardware       Provides hardware information about your system
  help           Help about any command
  host           Control the host/system that Home Assistant is running on
  info           Provides a general Home Assistant information overview
  jobs           Get information and manage running jobs
  multicast      Get information, update or configure the Home Assistant Multicast
  network        Network specific for updating, info and configuration imports
  observer       Get information, update or configure the Home Assistant observer
  os             Operating System specific for updating, info and configuration imports
  resolution     Resolution center of Supervisor, show issues and suggest solutions
  supervisor     Monitor, control and configure the Home Assistant Supervisor

Flags:
      --api-token string   Home Assistant Supervisor API token
      --config string      Optional config file (default is $HOME/.homeassistant.yaml)
      --endpoint string    Endpoint for Home Assistant Supervisor (default is 'supervisor')
  -h, --help               help for ha
      --log-level string   Log level (defaults to Warn)
      --no-progress        Disable the progress spinner
      --raw-json           Output raw JSON from the API

Use "ha [command] --help" for more information about a command.